
Completed Dolls
-
New Creative Paperclay Blog Post!
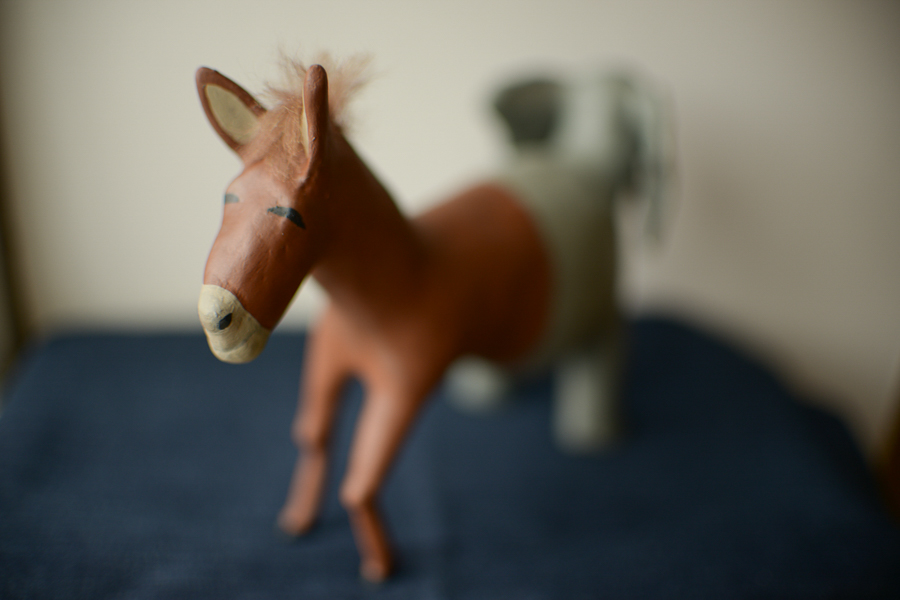
Hello everyone, I hope you are having a great weekend! This week’s post for Creative Paperclay’s blog tutorial series was inspired by the upcoming election. I wanted to create something that would inspire people to go out and vote while preparing for Thanksgiving dinner. See how I made this creature here! Hope you all go… Read more
art, artmaking, artwork, Blog post, craft, craftmaking, creative, Democrat, Donkey, Election Day, Elephant, fight for your rights, get registered, handcrafted, Handmade, imagination, make your voice count, One of a kind, sculpting, stand for something, take a stand, The Weekend, tutorial, VOTE, Vote or die, your voice counts -
Now Sponsored by Creative Paperclay®!
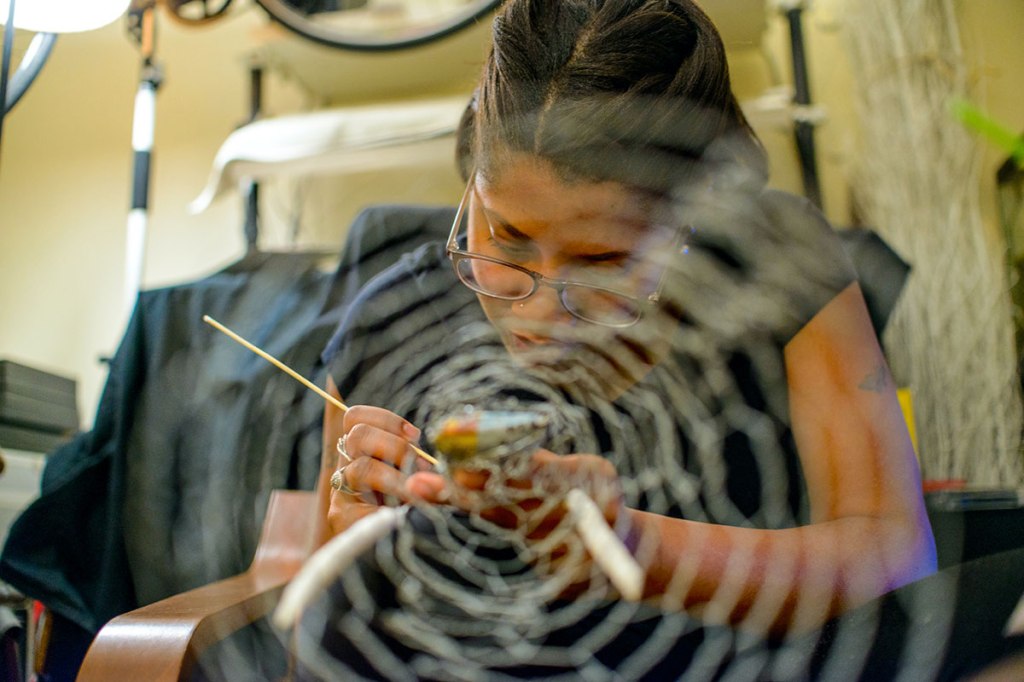
I am now part of the design team for Creative Paperclay®. I will be posting tutorials on their blog on the 4th Friday of each month! My first post for their blog series demonstrates how I created this Art doll in a frame. Head on over to their blog to see how it was put… Read more
art, Art doll, black doll, black girl magic, blackart, Bronx Artist, Brooklyn born and raised, clay, clay sculpture, creative paperclay, creepy, design team, doll maker, eerie, figurative, figurative art, handcrafted, Handmade, melancholy, Melandolly, Memorial day weekend, New York Art, nyc, sponsored post -
Career Goals
This piece is something that has been on my list to create for a while, but I finally decided to put it in motion when I saw the open call for the “Where We Are” show at the Puffin Foundation in Teaneck NJ. I’ve been wanting to submit some work to them, but I haven’t had… Read more
-
My Finished Piece, “Women’s Troubles”
For those who haven’t seen this piece named “Women’s Troubles” in its entirety on Facebook, Instagram etc., here it is completed. As I may have mentioned before, this piece explores the problems that women face in the workplace and at home. At work, women face issues such as being overlooked for promotions, unequal pay and sexual harassment, while at… Read more
accesstoart, ado, Andrew freedman Home, art, Art doll, Art work, artistofinstagram, arts and crafts, artshow, artwork, bizarre, bk, Boogiedown, Br, Bronx, BronxArtist, brooklynart, brooklynbred, brooklynraised, BX, durga, equality, fairtreatment, female, feminist, feministart, feministic, goddess, men, newyork, newyorkart, nyc, nycart, shiva, woman, women, womenstroubles -
The Evolution of Feet
With this last piece that I’ve worked on for Innuendos, I found myself sculpting a couple of things for the first time. The most challenging out of them all were the eight arms hands down (no pun intended!), but the most unusual out of my first time items were the feet. I never bother too much with sculpting feet… Read more
ado, Andrew freedman Home, Armory Arts Week, armory show, armory week, Art doll, Art work, artdollsonly, artistofinstagram, artopening, arts and crafts, artshow, bizarre, Bronx, Bronx Armory Week, Bronx arts Factory, Bronx New York, BronxArtist, BronxArtistDocumentaryProject, brooklynraised, bxartsfactory, clay, doll, Dollmaking, innuendos, Melandolly, NY Armory show, nyc art, sculpting, wip, work in progress -
Northside Festival: With a Few Melandollies
I have to say that the Northside Festival was my most challenging event by far! The Artist Chain Reaction at The Andrew Freedman home was pretty tough being that it was my first time creating a sculpture of almost 4 feet tall, but this time I had to create a few more in less than three weeks for an… Read more
ado, artdollsonly, artistofinstagram, artwalk, bedford, bedfordavenue, bk, BronxArtist, BronxArtistDocumentaryProject, brooklyn, brooklynart, brooklynartwalk, BX, clay, cutekid, doll, gottalovethekids, lovethekids, Melandolly, newspaper, newyorkart, northsideartsale #northside, northsideartscrawl, northsidefest, northsidefestival, nyarts, papermache, sculpture, statue, triskelionarts, williamsburg, williamsburgart, williamsburgwalks -
5 Day Artist chain reaction Competition @ The Andrew Freedman Home
The Artist Chain Reaction competition was an event where two artists who never worked together before were paired up to create an installation over the course of 5 days. It took place at the lovely Andrew Freedman Home on the Grand Councorse in the Bronx during Armory Week. I initially saw the open call for… Read more
-
Joyce is Now Complete
So here’s how Joyce turned out. In the process of creating this doll, I heavily relied on how she was portrayed in the documentary about her. Her character was dressed in blue throughout the whole movie, so I chose to to do the same with the doll. I decided to go with the hair style… Read more
-
My Seventh Show!
I am so excited about this weekend. This Saturday, June 8th will be MF Gallery’s big 10th anniversary extravaganza show. I will have the pieces shown above in it, and this will mark my 7th Gallery showing. All of the pieces will be priced at $100, so I might actually sell something for once,… Read more
-
Zombies Have Feelings Too
The funny thing is that making a zombie doll was the furthest thing from my mind when I originally started this one. When I let the clay dry, I noticed that her bone structure was a bit strong. That was the moment that I realized what she had become. But don’t let her looks fool… Read more
